
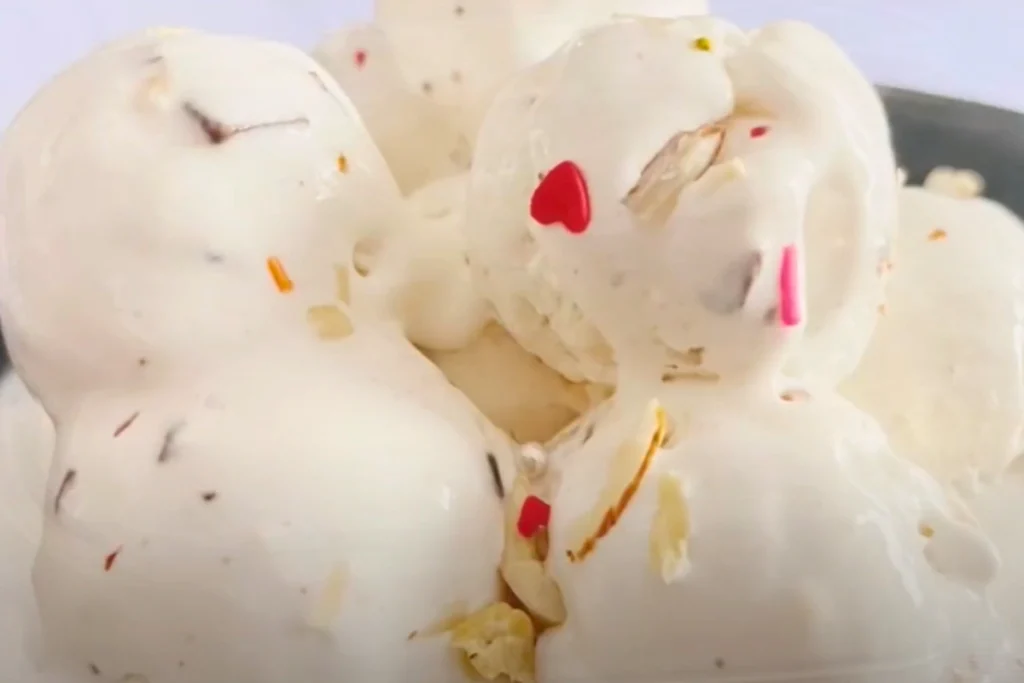
What’s the point of doing all the hard work of making ice cream at home?
Well, you can find vanilla ice cream in any grocery store but homemade ice cream has a richer and creamier taste that store-bought just can’t match. Our homemade vanilla ice cream recipe is incredibly simple, and it requires only a few ingredients.
Let’s get to the full article to have a detailed idea about vanilla ice cream and the step-by-step process of making it at home. We will share some tips as well which will save you from unpleasant mess-ups!
What Is A Vanilla Ice Cream?
Vanilla ice cream is a classic frozen dessert made from cream, sugar, and vanilla extract.
It’s widely popular throughout the world because of a long list of reasons! I mean, it has a so smooth & creamy texture and rich yet subtle flavour that nobody usually can say ‘no’ to this dessert.
It pairs well with many toppings and desserts, which makes it a favourite choice in a lot of countries and cultures. The taste of vanilla ice cream is quite difficult to explain, but I call it heavenly.
How to Make Vanilla Ice Cream?
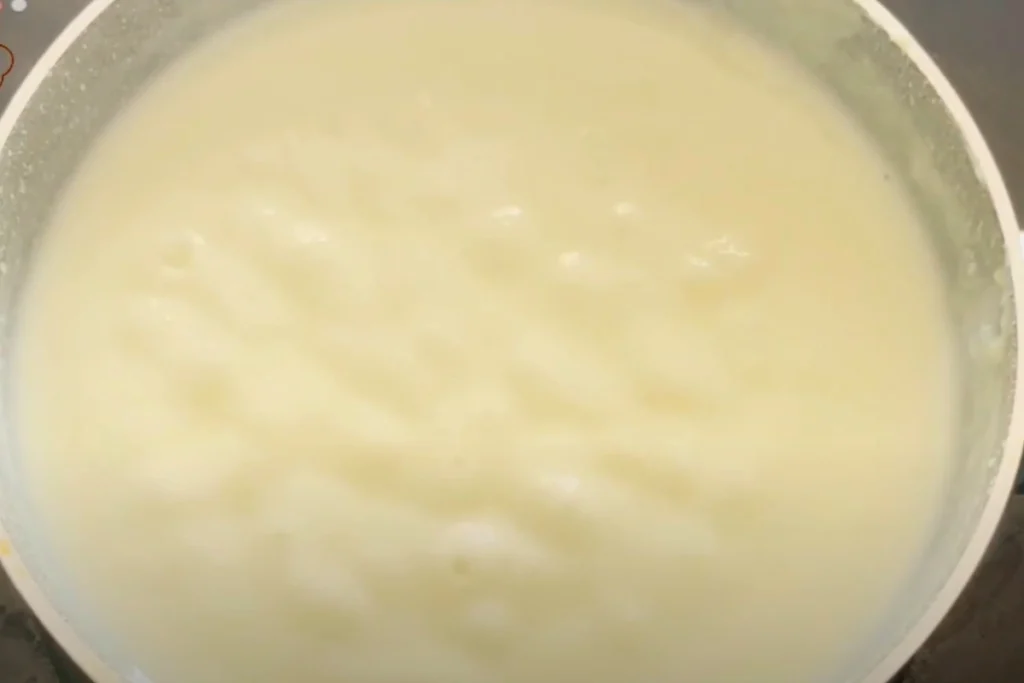
Cooking a mixture of 350ml milk with 1 and ½ teaspoons of cornflour, ⅓ cup of sugar, and a pinch of salt in a large pan.
Stir continuously on medium heat. Once the mixture achieves a thick consistency, allow it to cool completely before refrigerating it for 2 to 24 hours. Next, whip 1 cup of cream until fluffy, then blend in ½ cup of condensed milk for added richness.
Add ¼ cup of grated chocolate, which melts easily to the cooled milk mixture and stir to mix well. Pour the mixture into a mould and cover it with plastic wrap. Freeze for 6-7 hours or overnight until set and enjoy!
Homemade Vanilla Ice Cream Recipe
Servings: 506, Prep Time: 10-15 minutes, Freezing Time: 6-7 hours or overnight, Course: Dessert, Cuisine: American
Ingredients
- Milk: 350ml
- Cornflour: 1 and ½ teaspoons
- Sugar: ⅓ cup
- Salt: A pinch
- Whipped Cream: 1 cup
- Condensed Milk: ½ cup
- Grated Chocolate: ¼ cup
Direction
- To start, let’s pour 350ml milk into a large pan. Then, add 1 and ½ teaspoon cornflour, ⅓ cup sugar, a pinch of salt, and mix well. Continue cooking on medium flame until the mixture thickens. We will stir consistently. Otherwise, the milk can burn at the bottom of the pan. So, be careful about it, okay?
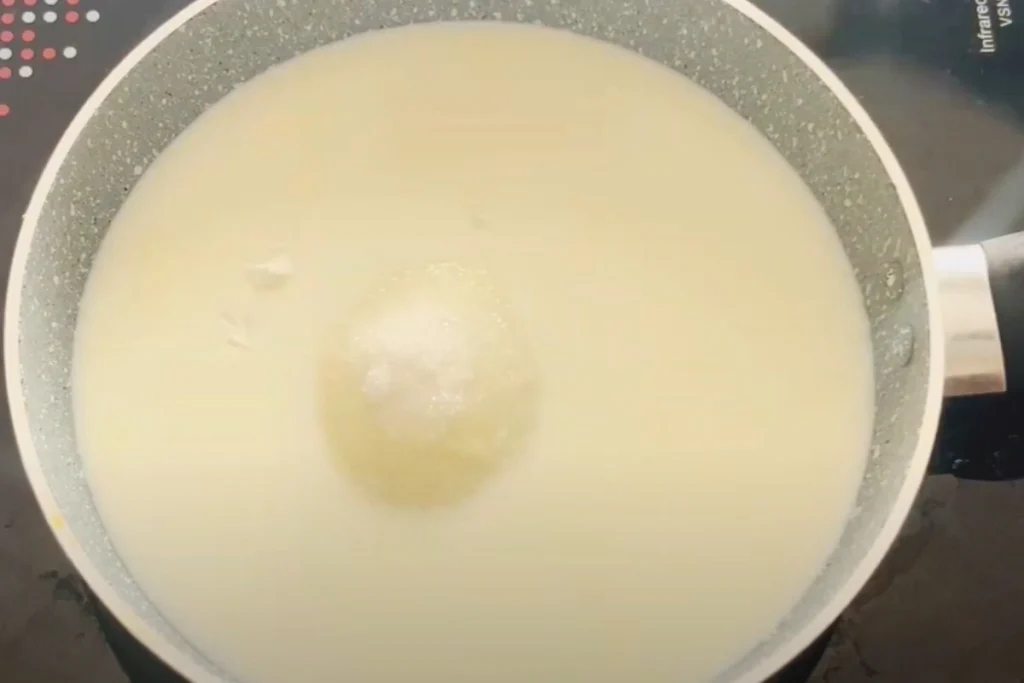
- It should take around 5 minutes for the sugar to dissolve fully. Meanwhile, you will notice a nice and thick consistency. Now, remove the pan and let the milk cool completely.
- Once the milk cools to room temperature, keep it in the refrigerator. It’s better to prepare this base from 2 to 24 hours beforehand. Doing it less than 2 hours in advance will not provide the best result. The ice cream will not thicken properly during the churning process.
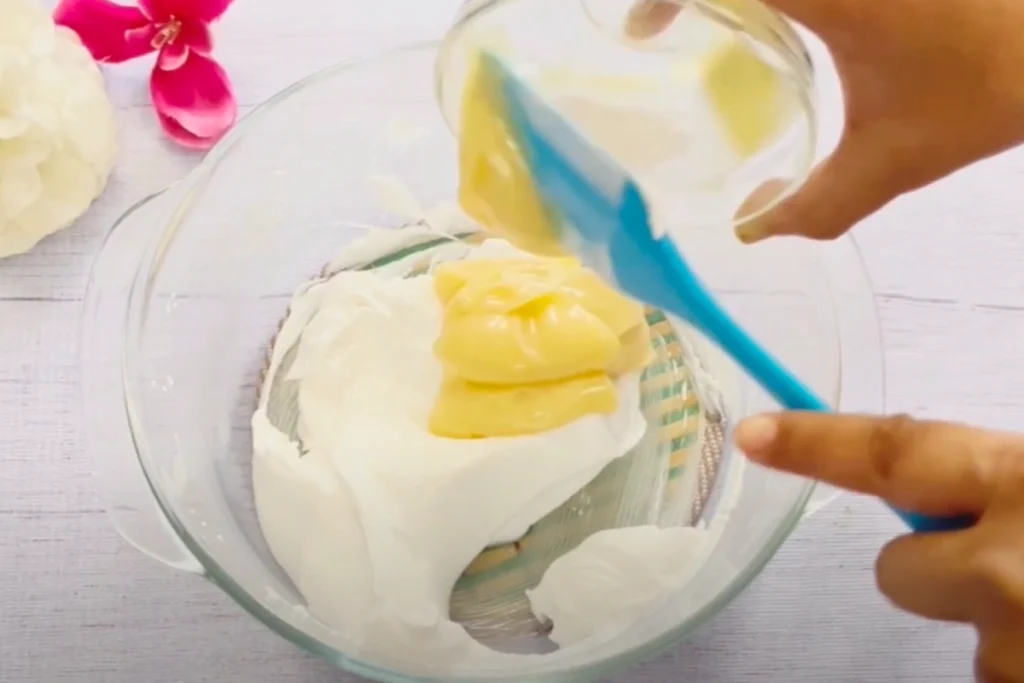
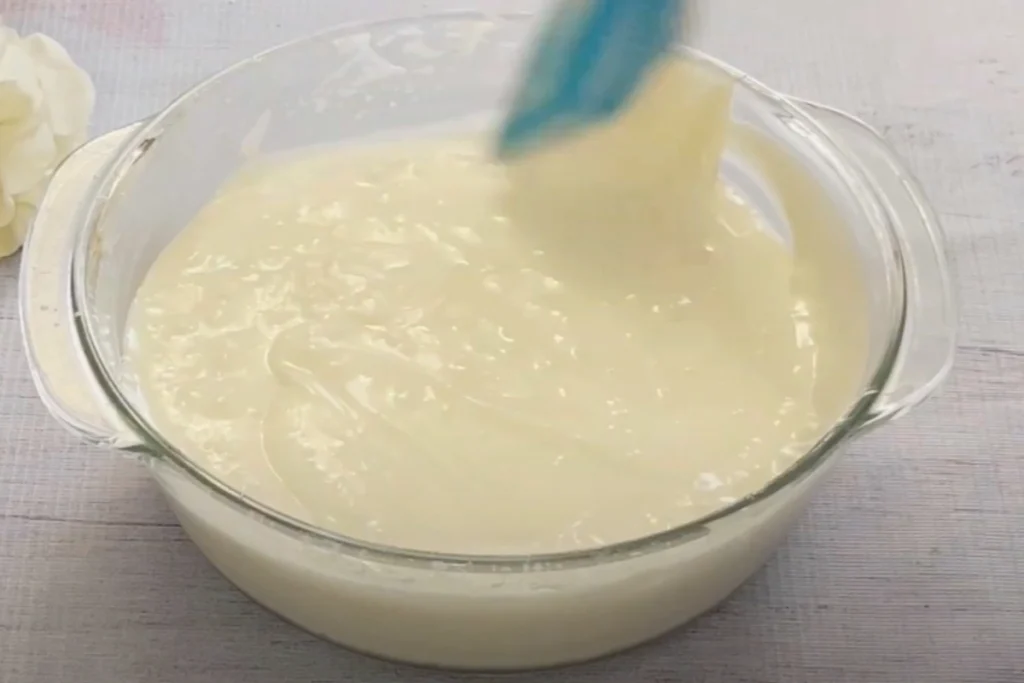
- After 2 or more hours, let’s start the main process. Take 1 cup of whipped cream in a large bowl. Now, beat it with either an electric mixer or a hand mixer to make the cream fluffy. I am using an electric mixer to make it easier and faster.
The cream’s consistency should be something like the picture.

- Add ½ cup of condensed milk to the cream and beat again for 2 minutes at medium speed. Condensed milk does a great job here; it adds a rich and creamy texture to the ice cream.
- After 2 minutes, add the milk & cornflour mixture to the cream. Again, 2 minutes of beating time, this is the last time (promise!).
- This time, we will add the most special ingredient of today’s recipe: grated chocolate. Add ¼ cup of grated chocolate.
The chocolate will melt more easily than larger pieces and disperse its rich flavour throughout the ice cream. The fine texture of the chocolate will also provide a contrast to the creamy smoothness of the ice cream.
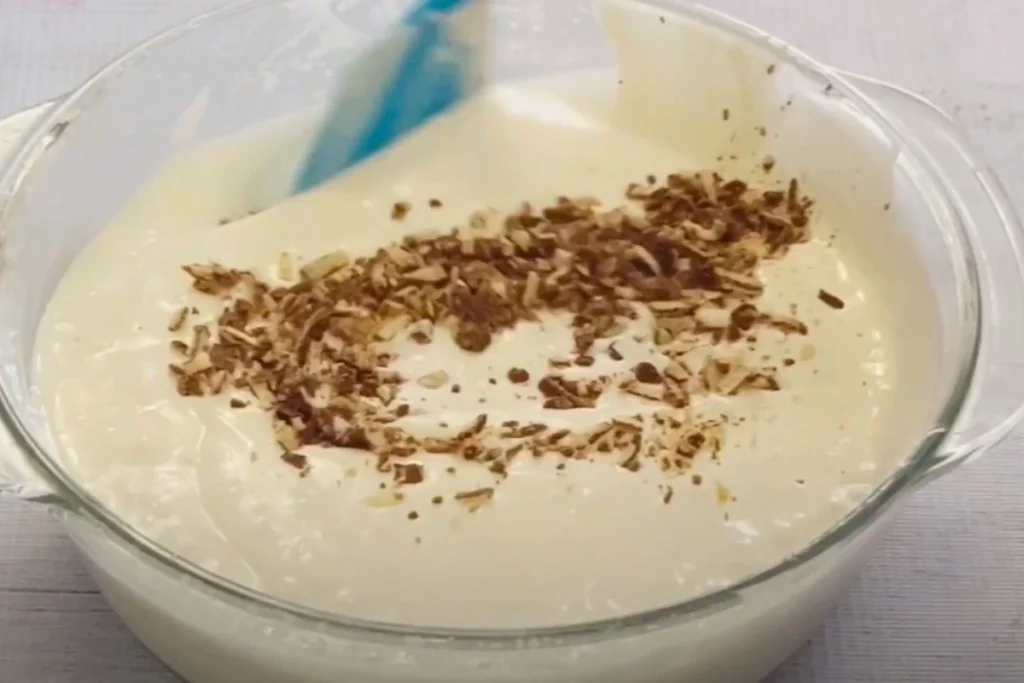
- Mix the chocolate well with the base of the ice cream. Simply use a spatula to stir and mix the ingredients. Now, pour it into a mould and tap the mould once to let the mixture settle evenly.
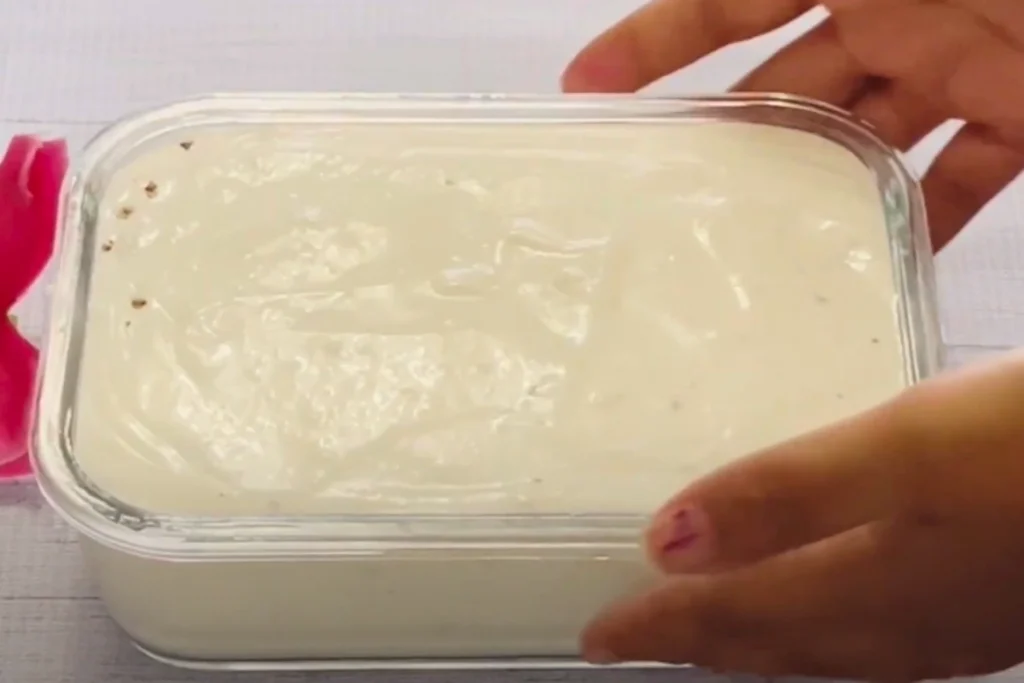
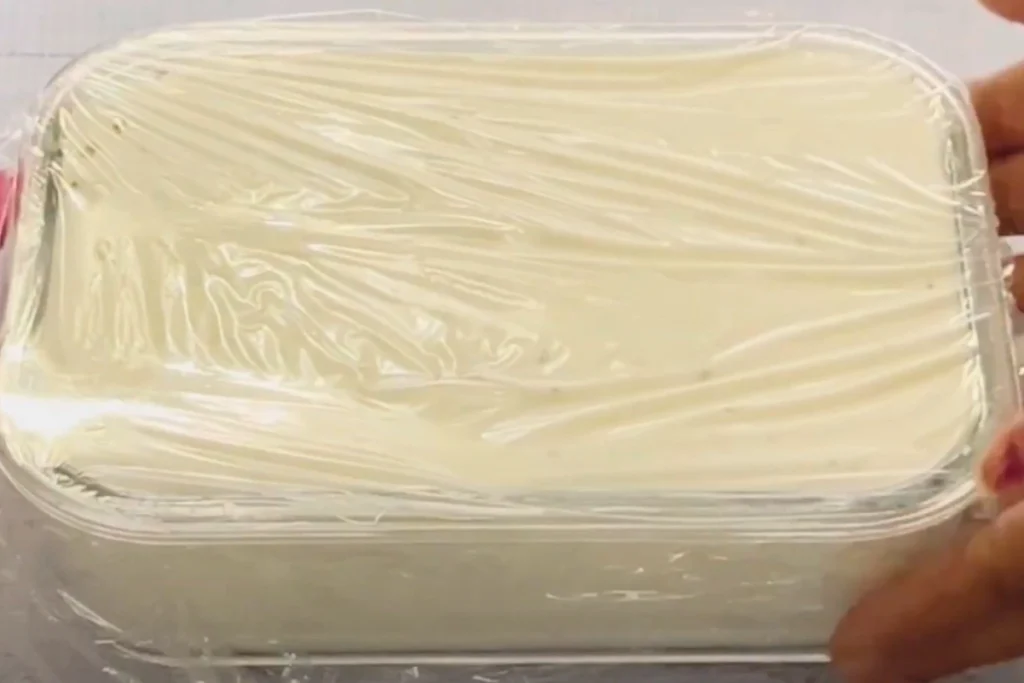
- The last step is to wrap the mould with a plastic wrapping, as shown in the picture. It will avoid direct exposure to cold air in the ice cream and keep the texture smooth. That’s all, you need to just keep it in the freezer for 6-7 hours or overnight.
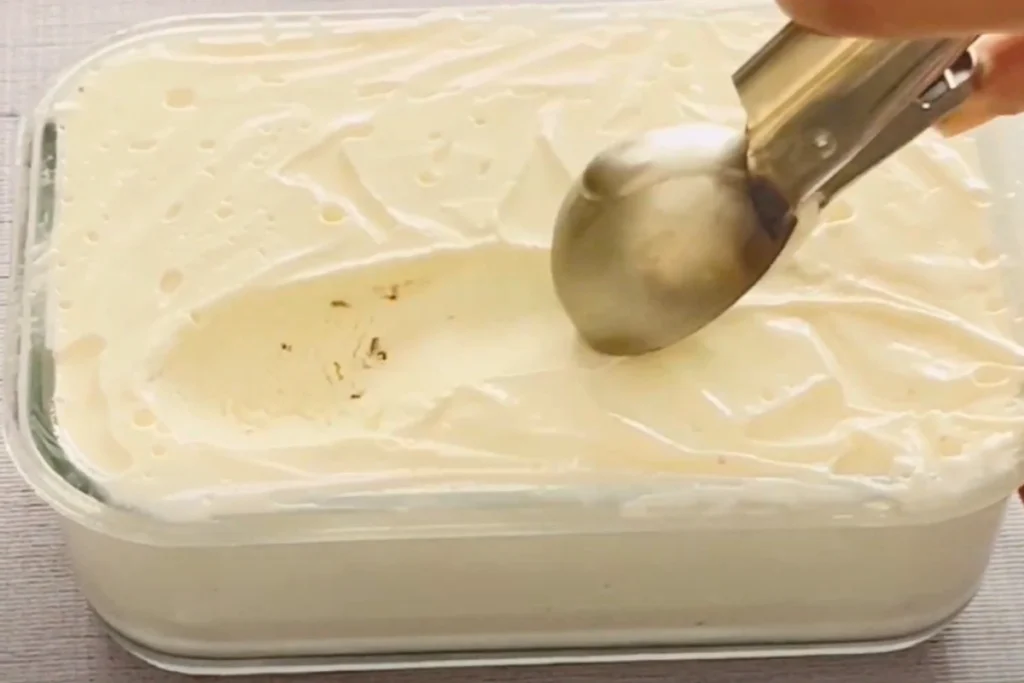
- After 6-7 hours or on the next day, the ice cream is set properly with the perfect consistency. So, what else now? Nothing else, you will enjoy the delicacy of the smooth, yummy, creamy vanilla ice cream. That’s it!
Side Dish Recommendations for Vanilla Ice Cream
Vanilla ice cream is an excellent dessert but you can enhance its excellence by pairing the ice cream with brownies, waffles, or pancakes.
I love adding fresh fruits or toasted nuts as well. And, if you want to add a warm chocolate flavour, try caramel sauce. Also, apple pie, chocolate chip cookies, cheesecake, and a lot of options are out there, you can try and find the most suitable one for your taste buds.
Chef’s Tips
- Stif the cornflour before you add it to the milk. It will avoid any lumps in the ice cream and ensure a smoother and creamier texture.
- Use whole milk, please. Try not to substitute whole milk with reduced-fat or skim milk. The higher fat content in whole milk will help you achieve a creamy texture in the ice cream, as lower fat options can cause an icier consistency.
- When you place the mixture in the freezer, make sure to press the plastic wrap directly onto the surface of the ice cream. Wrap it tightly to keep the texture smooth.